Unfinished paintings are more admired than the finished because the artist’s actual thoughts are left visible
Pliny the Younger circa 100AD
Flush from the success of the fundraising day, we headed back to the container two days later to finish stitching the planks together. As always with us, it seems, we needed to step back briefly to re-do a previous step. In this case it was the transom – that solid bit of wood at the rear of the boat. To achieve a closer fit we needed to remove it and file down the edges. At least it was another glorious day outside.
We refitted the transom easily enough and ensured that we left a note to ourselves about how to fit it correctly if we have to remove it once more. Amateurs! Now it was time to find the remaining planks to stitch on.
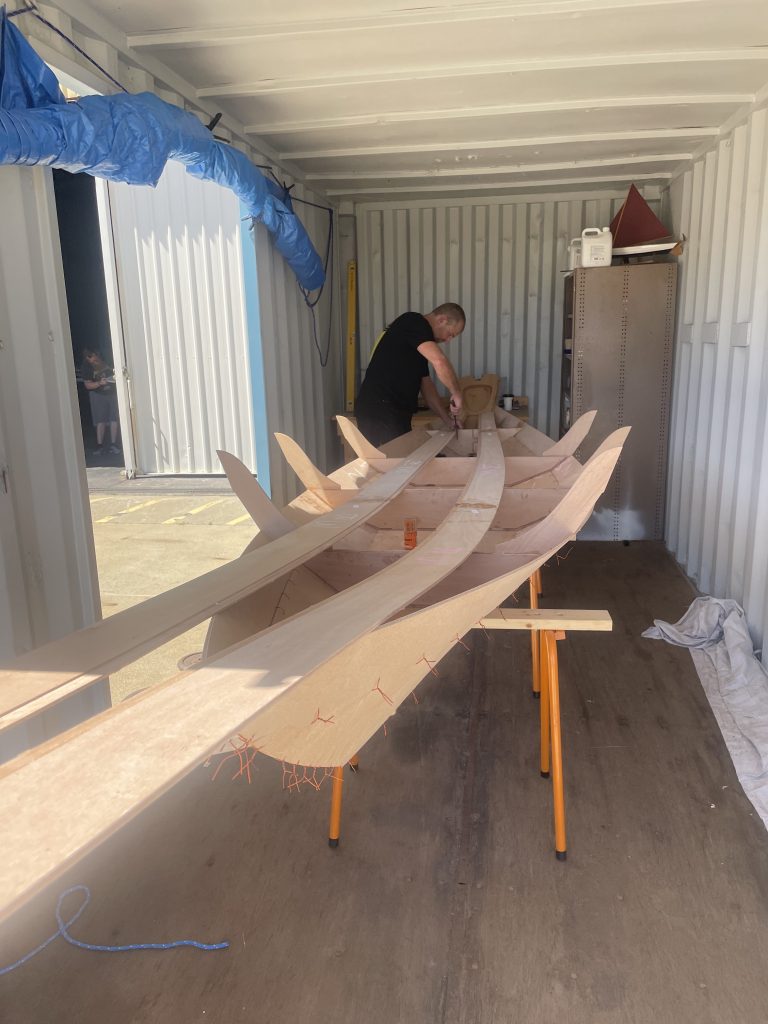
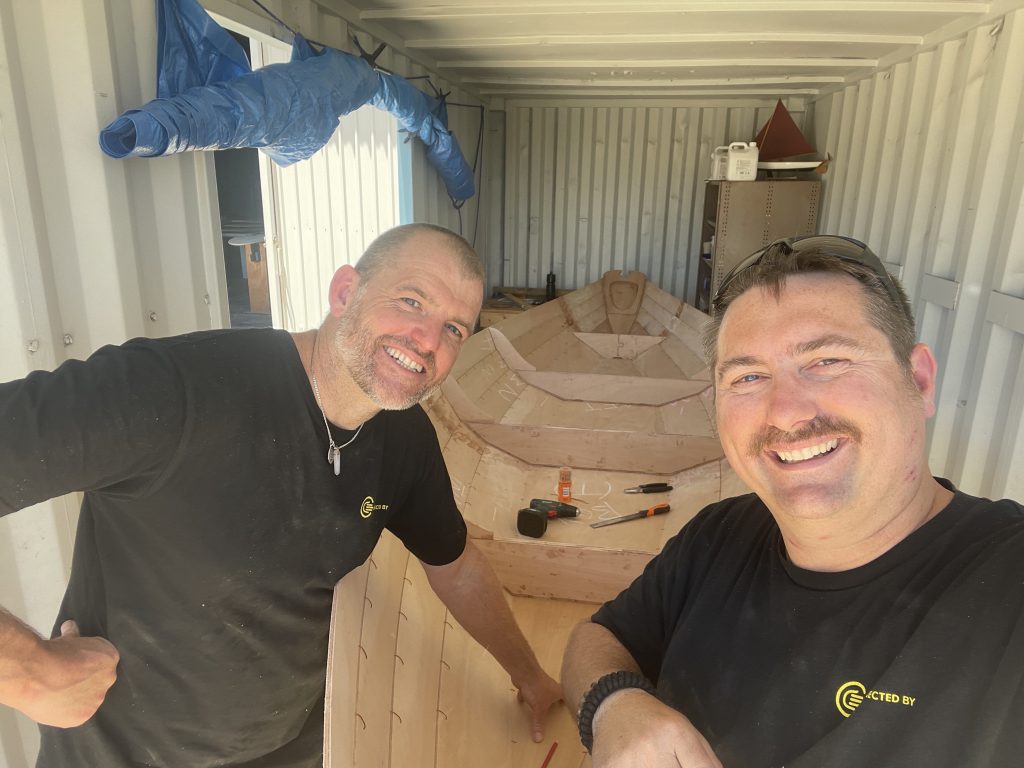
We pulled the last two planks out from storage in the shed and placed them on top of the boat. We were still restricted in prep-space within the 20′ container. I guess this should be heartening to those of you who are thinking of building a CLC 17′ dory and wondering how much room you need. Well, Chris and I can tell you – a 20′ container is all the room you need. It does get a bit cosy though, I’m not going to lie.
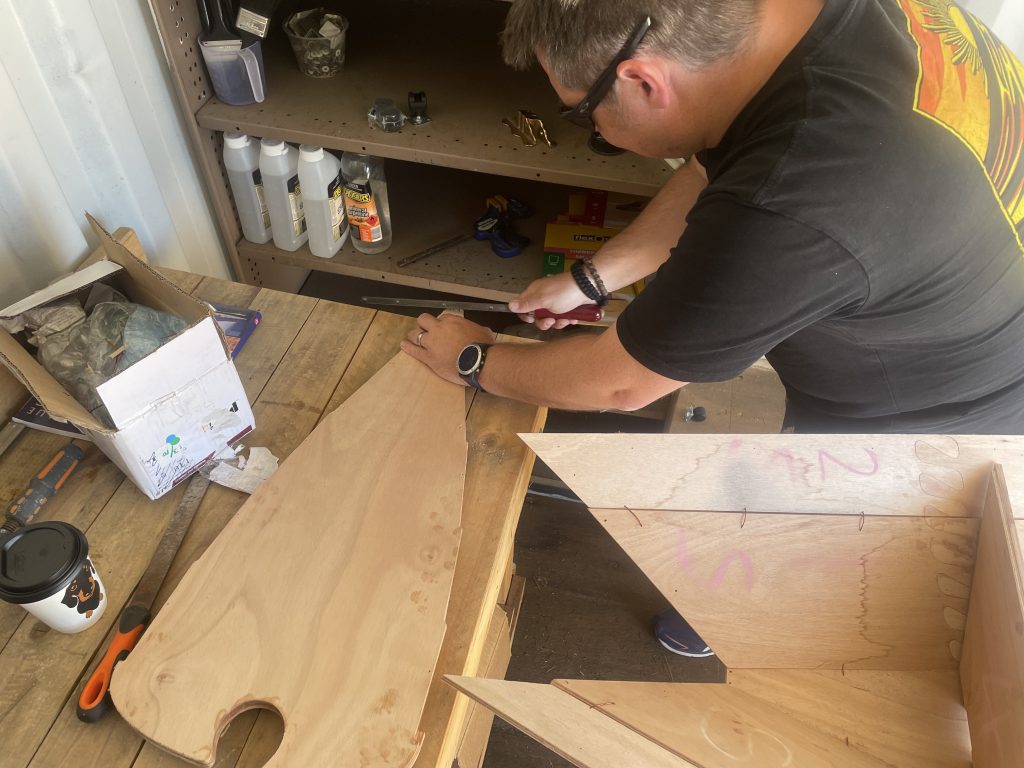
The planks needed their tabs filed off and then flipped to be on the correct side of the boat for stitching. We filed the tabs off with hand rasps.
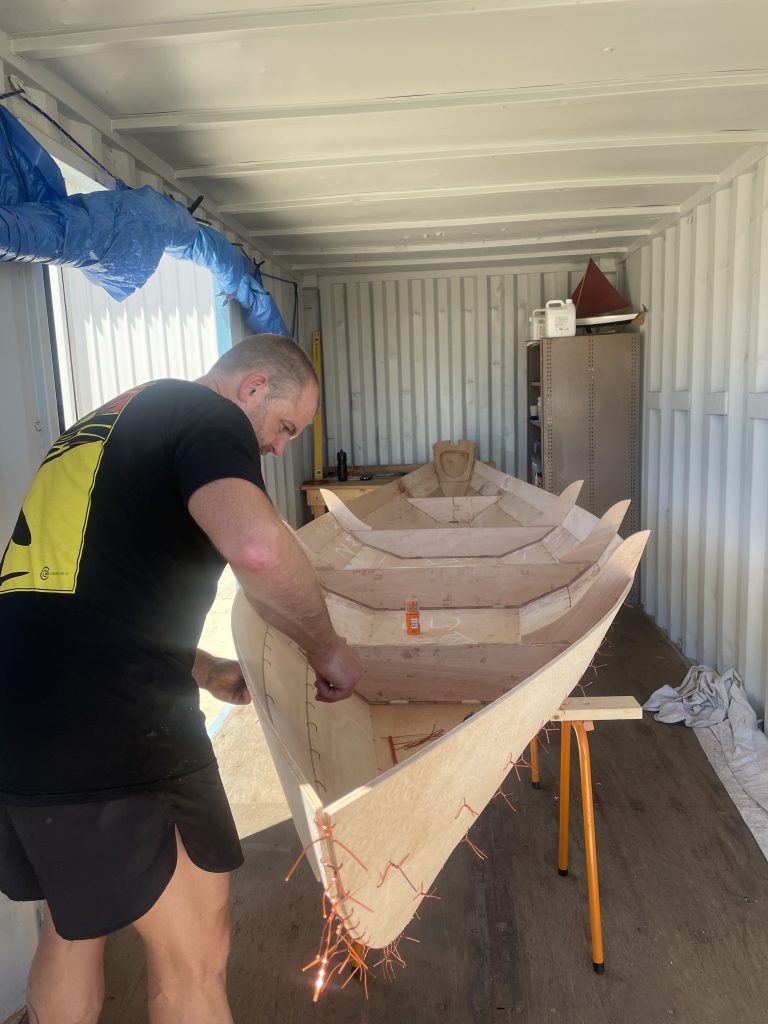

If you’re looking at the photos and thinking that Chris does all the work then I won’t argue. That bloke is a legend and also very fastidious. Speaking of the photos, have a look at the top right of the container and you can see the model boat that Chris built. This provides us a great deal of inspiration and aids in explaining to others just how small/big the boat will be.
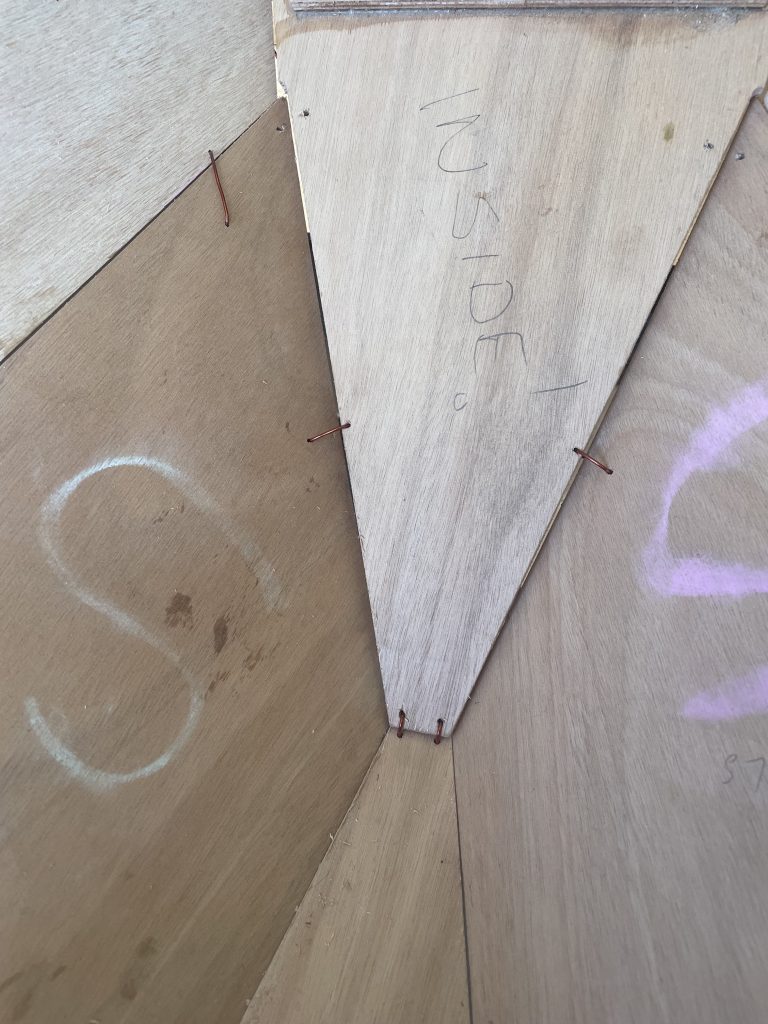
The process of stitching hasn’t changed from previous weeks so it was very quick work by Chris and I to get both sides down.
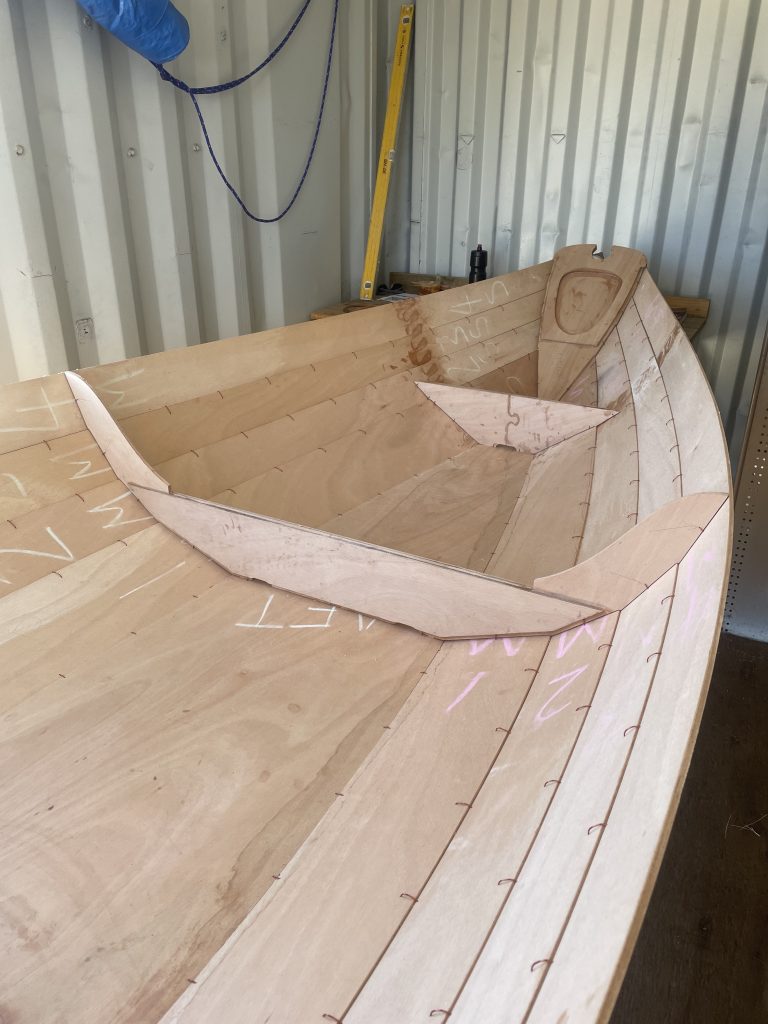
Let’s take a moment and have a look at her. Dubl Duck has taken form and now looks like a boat. You can feel her spirit forming. The wood looks beautiful and is extremely pleasant just running your hands down the fine lines of the planking. Today was a good day. All copper stitches are now in and the hull and bulkheads are now fastened together.
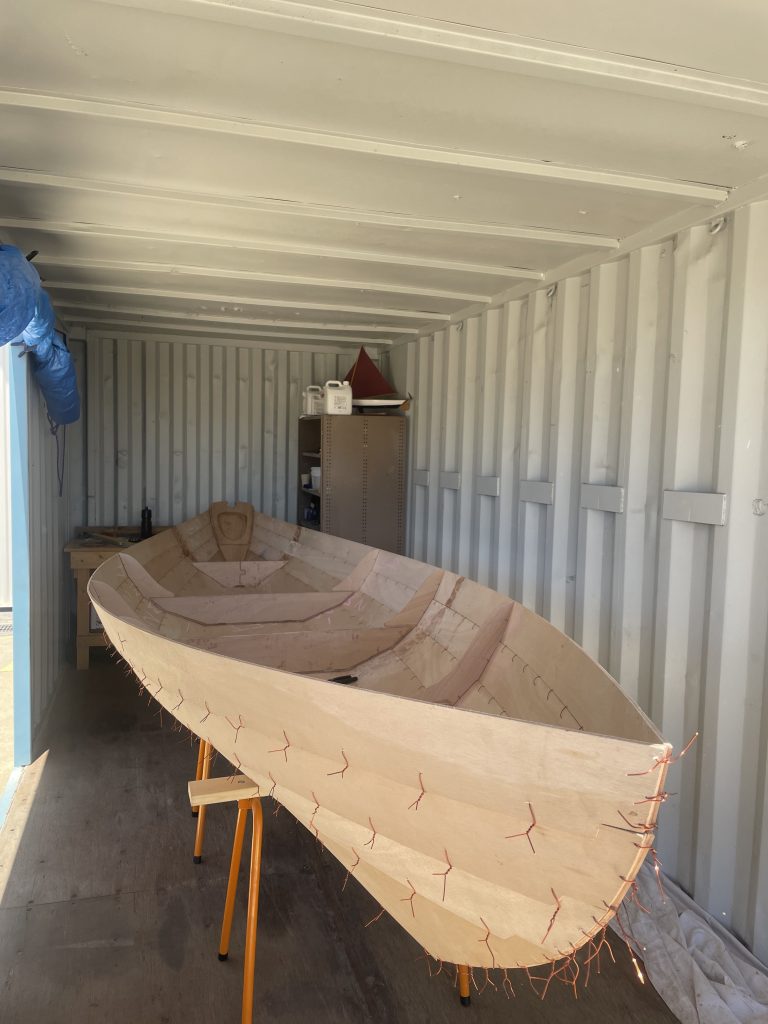
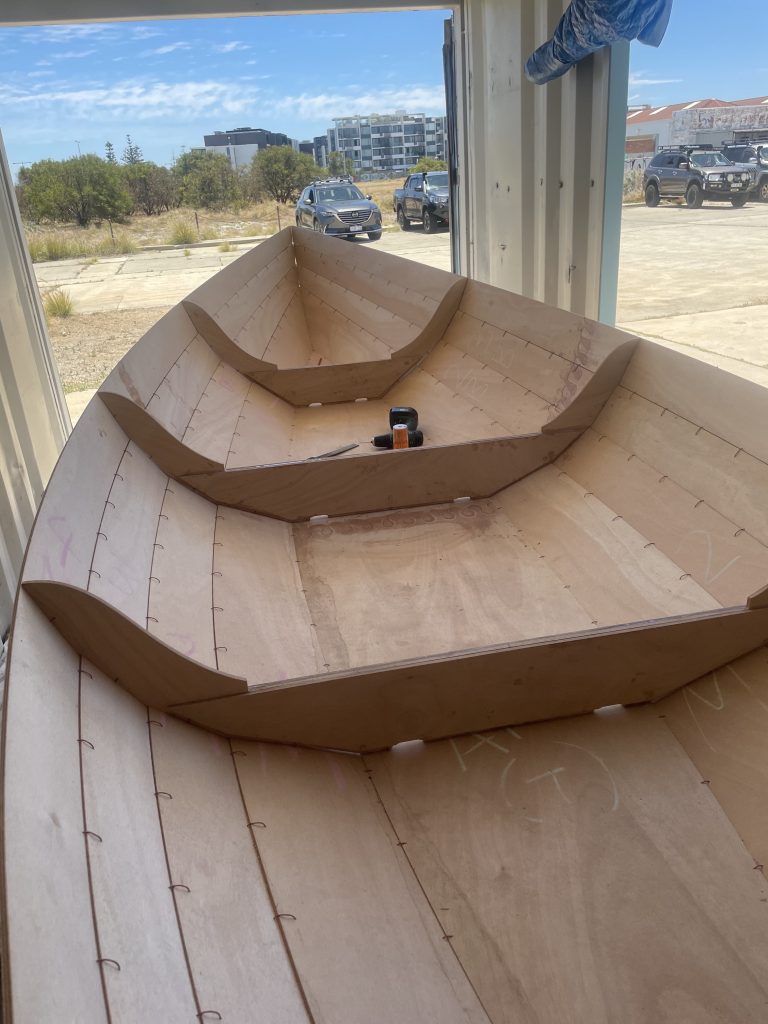
You can really get a sense. of her size. and even image the bow wake created as she carves through the water. This finishes the first stage of the boat build. Next we’ll begin using epoxy to seal and bind the planks together before removing the copper stitches.